Fix 100% Disk Usage in Windows 10
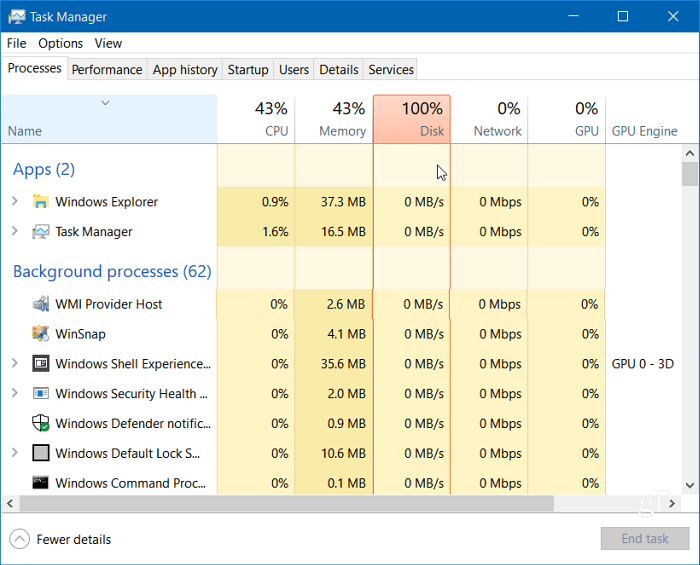
When you’re trying to figure out what’s causing the slowdown, you might have noticed that the Disk usage is 100% in Task Manager.
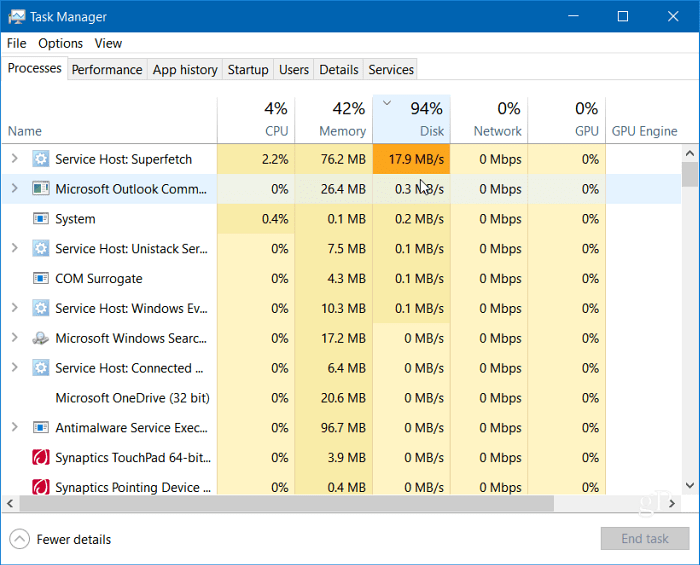
One of the easiest ways to find the culprit is to click the Disk column in Task Manager, so the items taking up more resources display in descending order. Like in this example shown below, you can see SuperFetch is likely the culprit.
Disable Windows Search
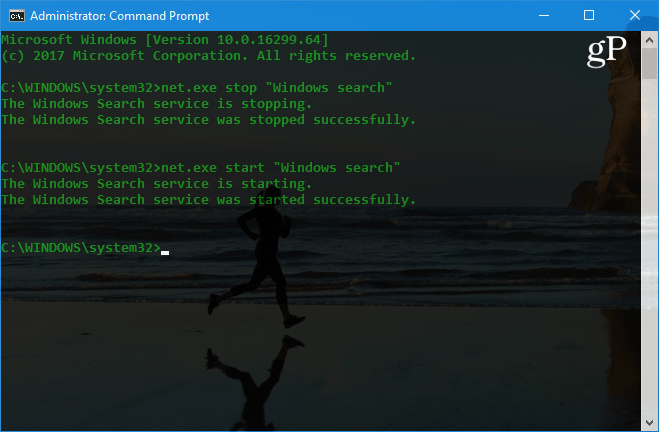
The Windows Search feature always indexes all files on your drive and is meant to make finding files on your PC faster. However, it can cause an issue where the disk is being overworked. Hit the Windows Key and type: cmd and right-click Command Prompt from the result at the top and click Run as Administrator.
Then in the Command Prompt type: net.exe stop “Windows search” and hit Enter. After that, check Task Manager to see where the disk usage is at. If there is no change, you can restart it from the command line, type: net.exe start “Windows search” and hit Enter.
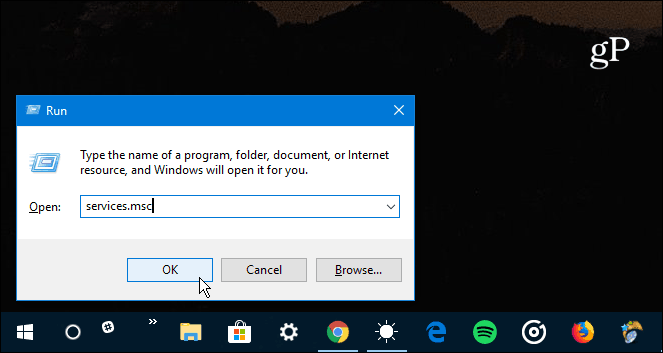
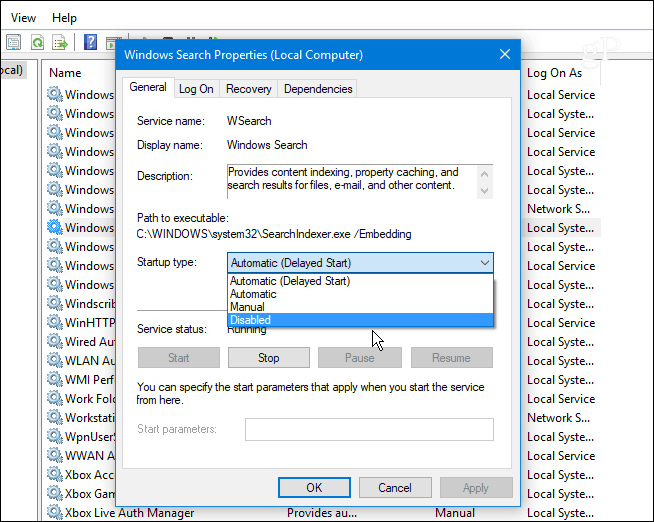
The good is turning off Windows Search is just temporary, and you can see if performance improves. If this fixes the issue, you can turn it off permanently. Hit the keyboard shortcut Windows key + R and type: services.msc and click OK or hit Enter.
Scroll down the list of services and double-click Windows Search, and under the General tab, set the “Startup type” to Disabled and click OK and close out of services.
Run a Disk Check
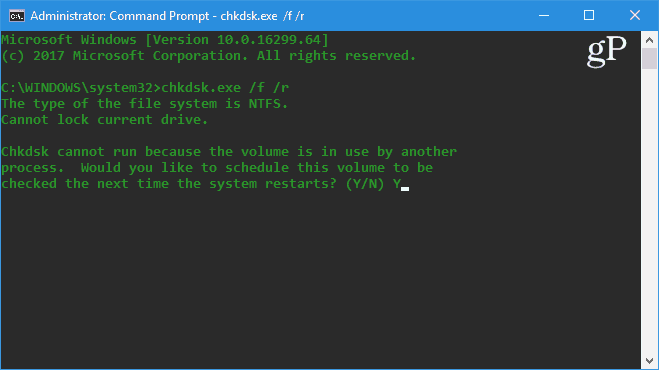
Windows has a built-in tool that will scan your drive for errors and attempt to correct them. Open the Command Prompt as Admin and type: chkdsk.exe /f /r and hit Enter. Then on the next prompt type: Y and hit Enter.
For more detailed information on the many ways to run and use this utility, check out our article on how to prevent issues and fix errors with Disk Check in Windows 10.
Disable the SuperFetch Feature
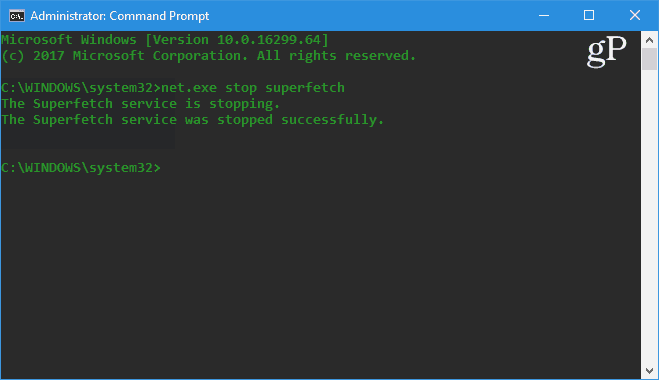
SuperFetch is a feature that helps decrease boot time by making apps load more efficiently. However, it can cause problems with your drive. To disable it, launch the Command Prompt as Admin and type: net.exe stop superfetch and hit Enter. Give it a few minutes and see if that improves the disk usage percentage in Task Manager.
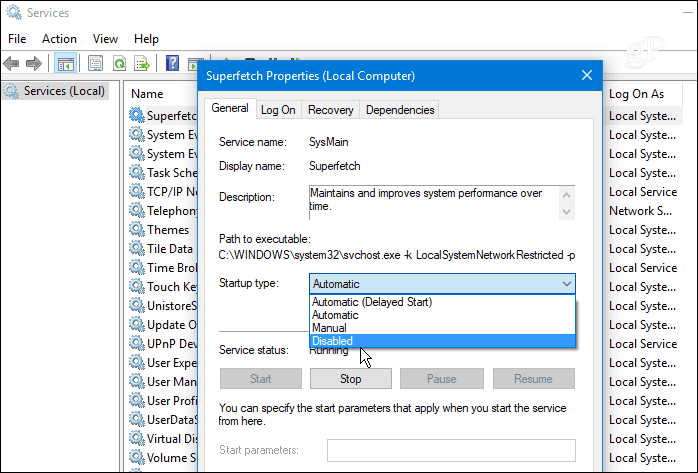
If this fixes it, you can permanently disable it, just like you can with Window Search (shown above), by heading to services.msc and disable the Windows SuperFetch feature.
Fix Chrome or Skype
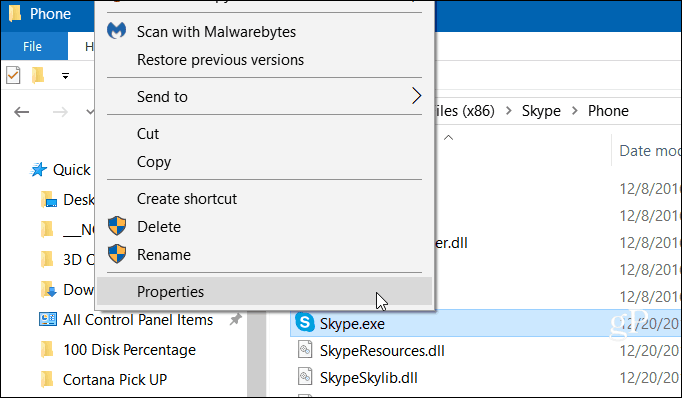
A couple of other programs that have often been reported as causing the 100 percent disk issue are Skype and Chrome. If you find that Skype is causing a problem, close out of it completely. Then head to C:\Program Files (x86)\Skype\Phone and right-click on Skype.exe and select Properties.
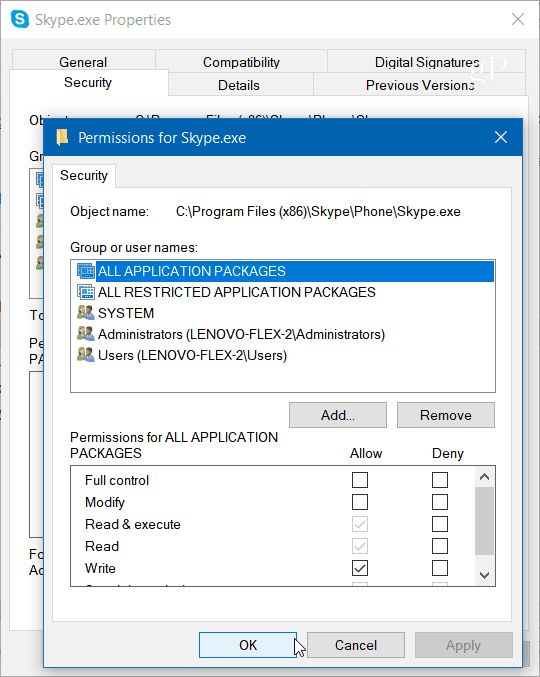
Head to the Security tab and click the Edit button. Make sure All Application Packages are highlighted and check Allow for Write Permissions and click OK.
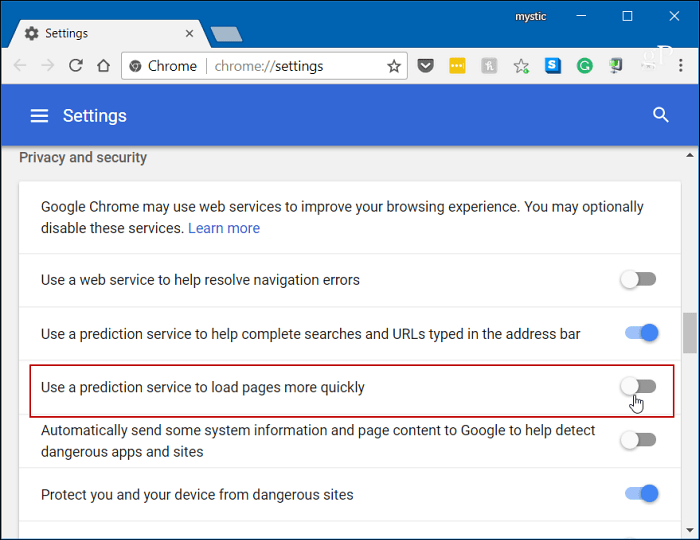
For Chrome, the most common issue is it uses too many resources with its prediction service to load pages faster. To disable it, head to Advanced Settings, and under the Privacy and Security section, turn off “Use a prediction service to load pages more quickly” and restart the browser.
Wrapping Up
Usually, one of the options above will fix an over-worked hard drive, but not always. If you’re running an antivirus suite like Norton or Kaspersky. Ensure your computer is offline, and then temporarily disable the antivirus software to see if things improve. If so, contact the company’s customer service. Also, make sure all device drivers are up-to-date, and another place to look is Virtual Memory. If you have made changes to it in the past, go back and reset it to default settings. Have you experienced this problem on your Windows PC? Let us know the steps you took to fix it. And for more tips, tricks, and troubleshooting advice, check out our Windows 10 Forums. As per article, I’ve tried turning off Superfetch but I find that it makes very little difference, and you are better leaving it on. https://www.groovypost.com/reviews/freeware-everything-voidtools/ I spoke too soon about the clean install. After I got my apps & files set up, the disk usage rarely goes over 10%. When it does go up, it goes back down in a few seconds. The highest I’ve seen has been 83%. I did the full clean install that reformats and allows user to select partitions to be included in the reformat, so I have a lot more room on the drive. Clean install is an extreme move. It’s time-consuming & there are a couple of pain-in-butt glitches to work around, but everything is faster & smoother after getting rid of update after update from Win 10 & any residuals from Win 7. There’s more than one way to do a clean install– ex Fresh Start in Defender. But the full, deep-down install after reformat is best done with a download of Windows 10 Installation / Media Creation Tool. Didn’t mean to go on & on– I’m just really happy with the results & am totally rid of the 100% Disk usage horror :p Comment Name * Email *
Δ Save my name and email and send me emails as new comments are made to this post.


![]()
