Pause Windows 11 Updates
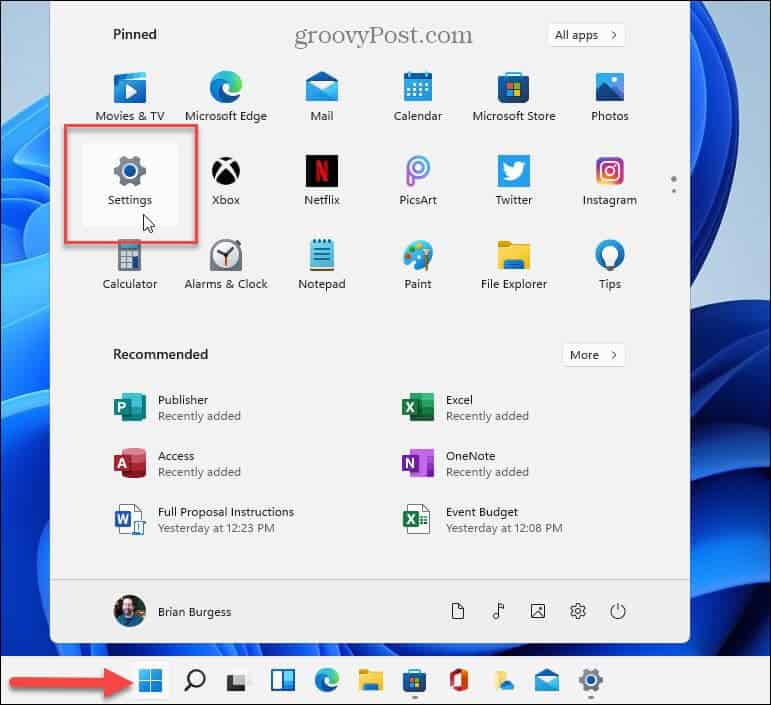
To begin, click the Start button and then click Settings from the menu. Alternately, you can use the keyboard shortcut Windows key + I to open Settings directly.
When the Settings app opens, click on Windows Update at the bottom of the list on the left.
On the following “Windows Update” page, click the “Pause” dropdown and there you can choose to pause updates for up to five weeks.
After clicking the button, you’ll see the following message letting you know that updates are paused. It will display the date (based on the number of weeks you choose) for when automatic updates will resume.
To resume automatic updates, go to Start > Settings > Windows Update and click on the Resume Updates button.
When you resume updates, Windows 11 will check for any new updates that became available while you had it paused. If it finds any, you can install it immediately by clicking the “Install” or Download Now” button. The name of the button varies based on the type of update that’s available. And if there is an out-of-band update that comes up, or you like to stay on top of things, you can manually check for updates. And if you aren’t on Windows 11 yet, check out these four ways to turn off Windows 10 updates.
More on Windows 11
For more on the new operating system, take a look at how to clean install Windows 11. Or, if you’re just getting started with it, take a look at how to move the Start button to the left or how to use the new virtual desktops feature. Comment Name * Email *
Δ Save my name and email and send me emails as new comments are made to this post.


![]()
